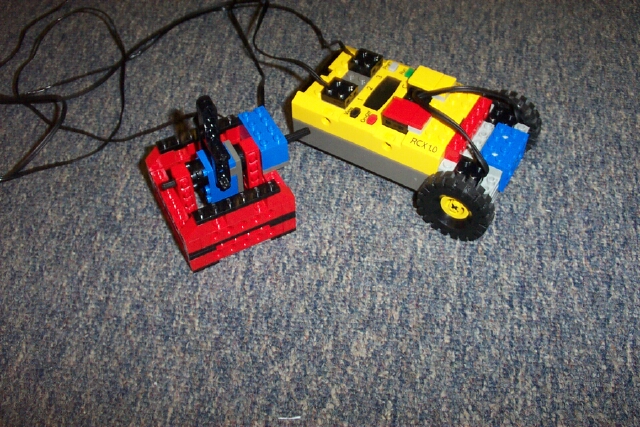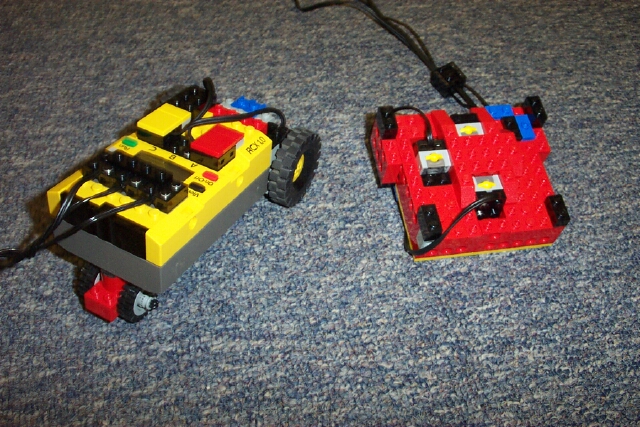


Hi! Our names are Jason and Bryan. Our fourth Lego project was a Remote Control Car. This was so far my favorite project. Instead of using LEGO DACTA Control Lab software to program it, we used a new program called the Yellow Brick Logo. The Yellow Brick is a Lego brick that acts like a mini computer. It also acts as the interface box. The first thing we did was built the car. It was easy because the Yellow Brick acted as the base of the car. All we did was add a motor and bricks and we were done. The joystick was easy because we already built it! The next thing we did was open the yellow brick program. We then typed in the procedures. The commands were a little bit different. Instead of setleft and setright, it was thisway thatway. No, this is not a joke. Instead of talkto "motora it is now like this a, something. After we wrote the procedures we wanted to test it out. This is how you do it. SInce we, me and Jason, wrote procedures on the computer and to try it out with the yellow brick we have to download the information to it. The things we needed to have was a Lego infrared Tower [a mouse like shaped signal sender] connect to the computer and a plug. The plug is designed to go into the Yellow Brick so that the batteries don't wear out while downloaing the information on the computer into the Yellow Brick. Once we downloaded it we tested it out. The car was co-co for coco puffs! It didn't even try to turn and the controls were backwards. We couldn't figure what was wrong! So we asked Mr. St Clair. He thought that maybe we needed new batteries. He gave them to us and it didn't work. So he thought maybe it was the motor. That didn't work. He did have a hunch that maybe it didn't have enough power to move. . . . so he then said to raise the power to 9. It was 8 before. The thing was that it may not work. The maxiumum power for the Yellow brick was 8. We tried it and it did work. We even tried ten and it still worked. After that we tried it out. It worked except for it not being able to go straight. The joystick also went out of adjustment and went crazy. So we built a new control. It uses touch sensors. Instead of four ways of moving it only does 3. So we chose forward, backward, and left. It works a lot better than before. We even made a new wheel. That got us 00:12 seconds. That course was a straight away race. We needed to touch a peice a tape to finish. Then we went on a new course. We got 56, 50, 51, and 42. The times were higher because the race went around a table two times then passed a line in the classroom hallway.
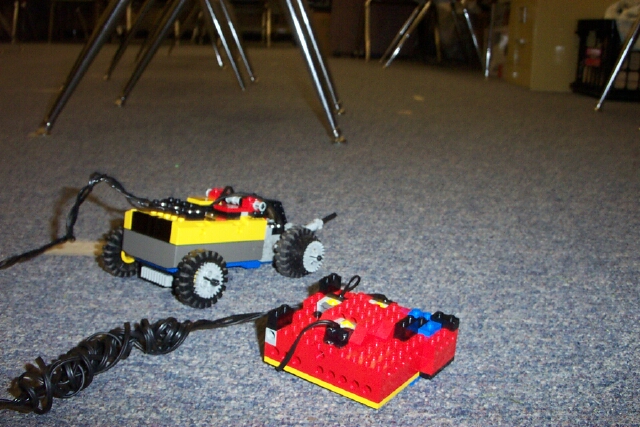
Then we went on a new and challenging course. It involed a lot of turning. We put chairs and we had to go around them. This was quite hard because if it turned wrong, you would have to move back and that cost us time. I was the worst of the two drivers so I let Jason drive. He was the best driver of the two of us. With him driving we got the best time, 18 seconds. Our other times were 24, 35, 25, 38, 22, 28, 27, 26, and 18 seconds. Which proves Jason was the better driver.
Check our modified and current car
Below is a picture of the remote control car, the modified one, and the procedures. The third picture shows where we had to start on the third course. You can see the chair legs that we had to go around .


to forward
a, thisway
c, thatway
ac, onfor 1
end
to back
a, thatway
c, thisway
ac, onfor 1
end
to right
a, thisway
c, thisway
ac, onfor 5
end
to left
a, thatway
c, thatway
ac, onfor 5
end
to drive
ac, setpower 9
launch [start]
end
to start
ac, setpower 9
Loop[
if switch1 = 1 [left] if switch2 = 1 [forward ] if switch3 = 1 [back]]
end